Hello, fellow Instagrammer 📸! We can’t stress enough how thrilled we are to have you on board 🚀. To get you started on your quest to build an even greater following on Instagram, you first have to go through a few simple setup steps. No worries, it shouldn’t take more than 3-5 minutes of your time and you’ll be ready to roll.
Followyst differs from other Instagram growth services in that it runs on your Android smartphone. This makes it the most secure and safest product on the market, since you’re in control at all times.
In case you don’t own an Android smartphone or don’t want to use it, check out our guide on how to configure and use BlueStacks Android emulator with Followyst.
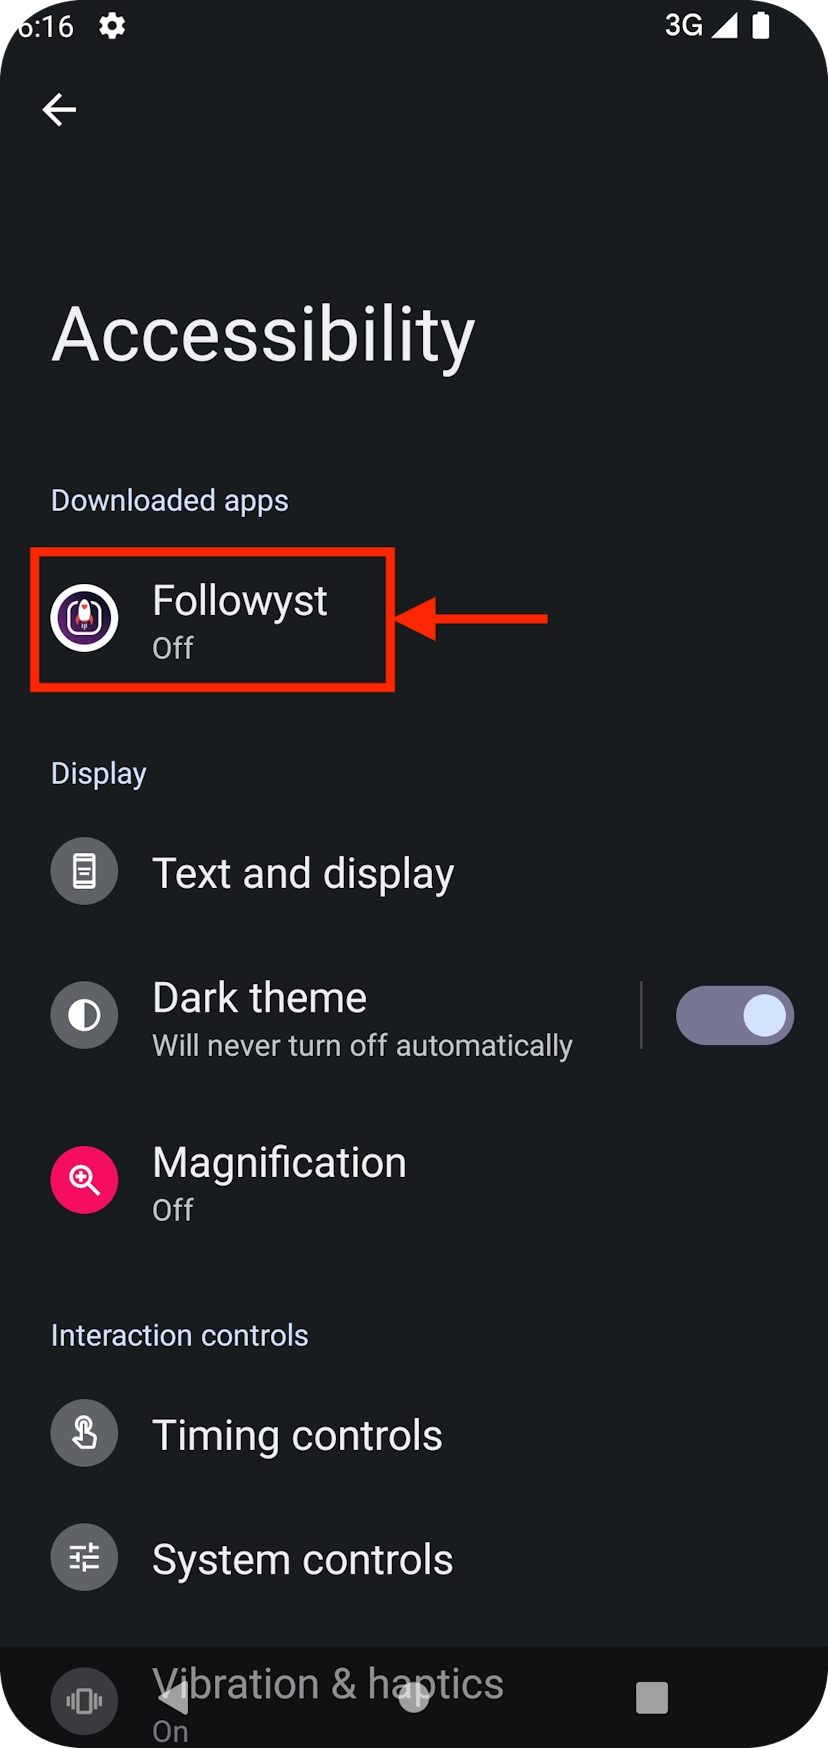
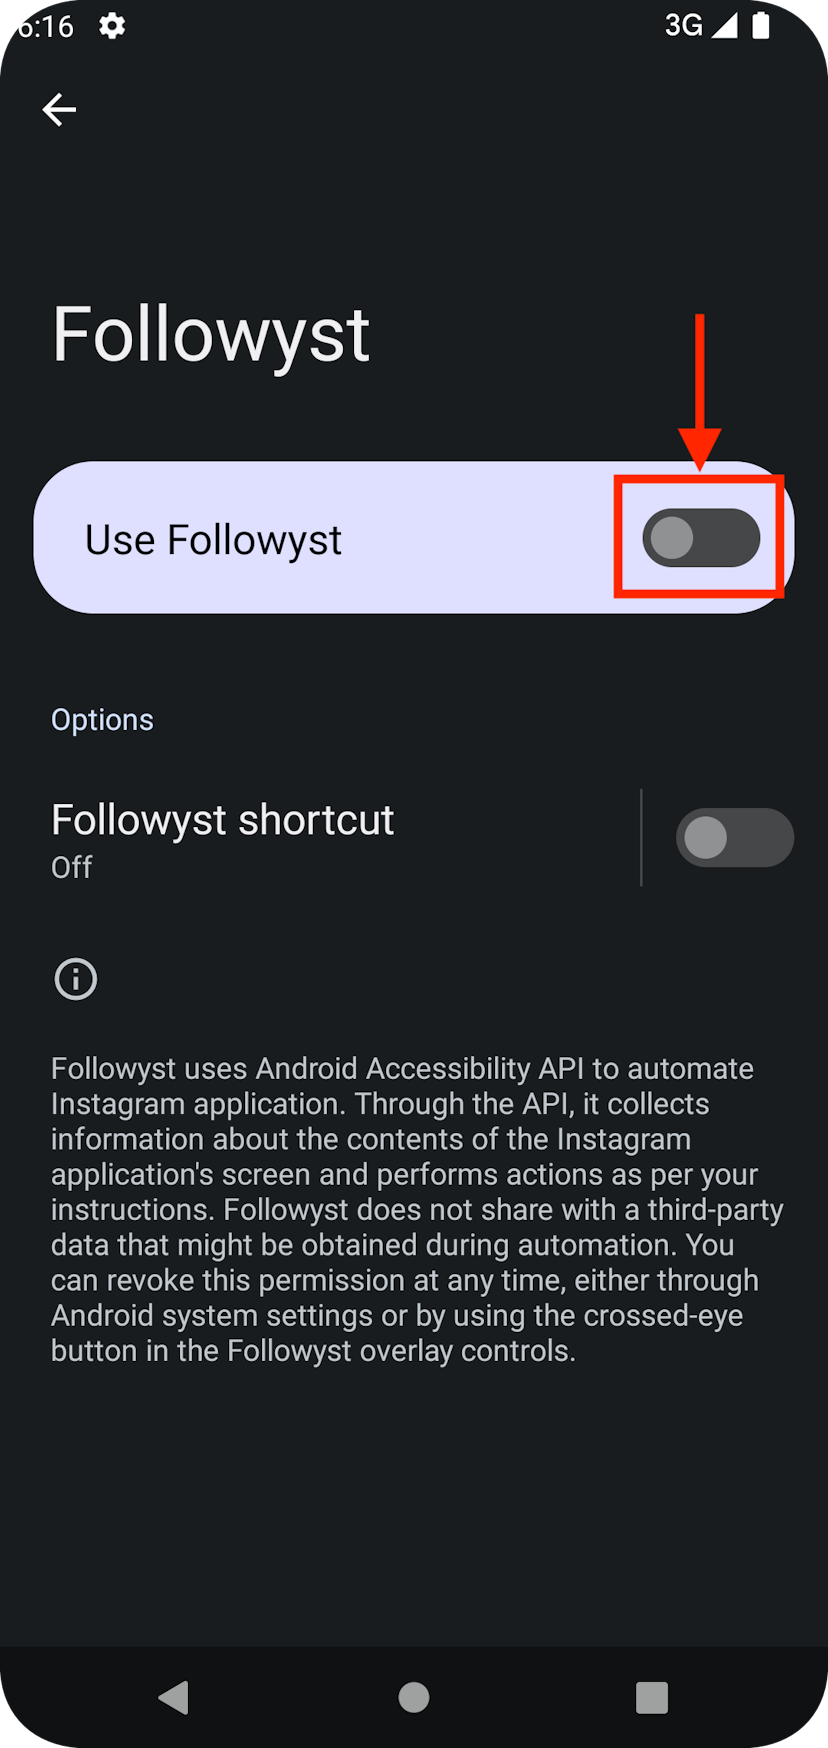
Granting required Android permissions
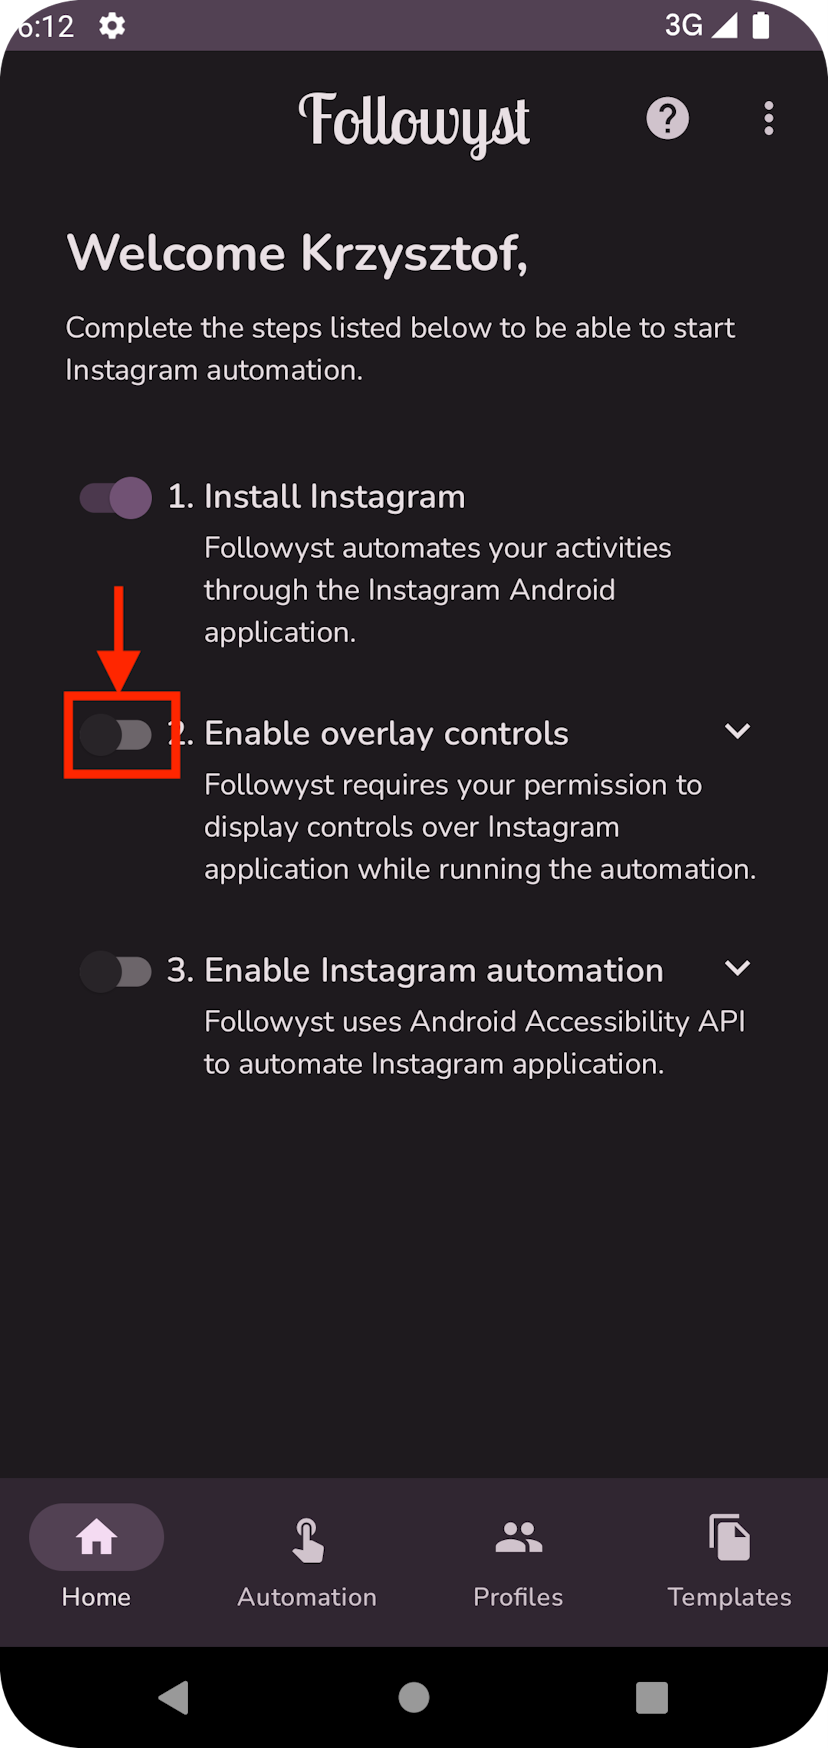
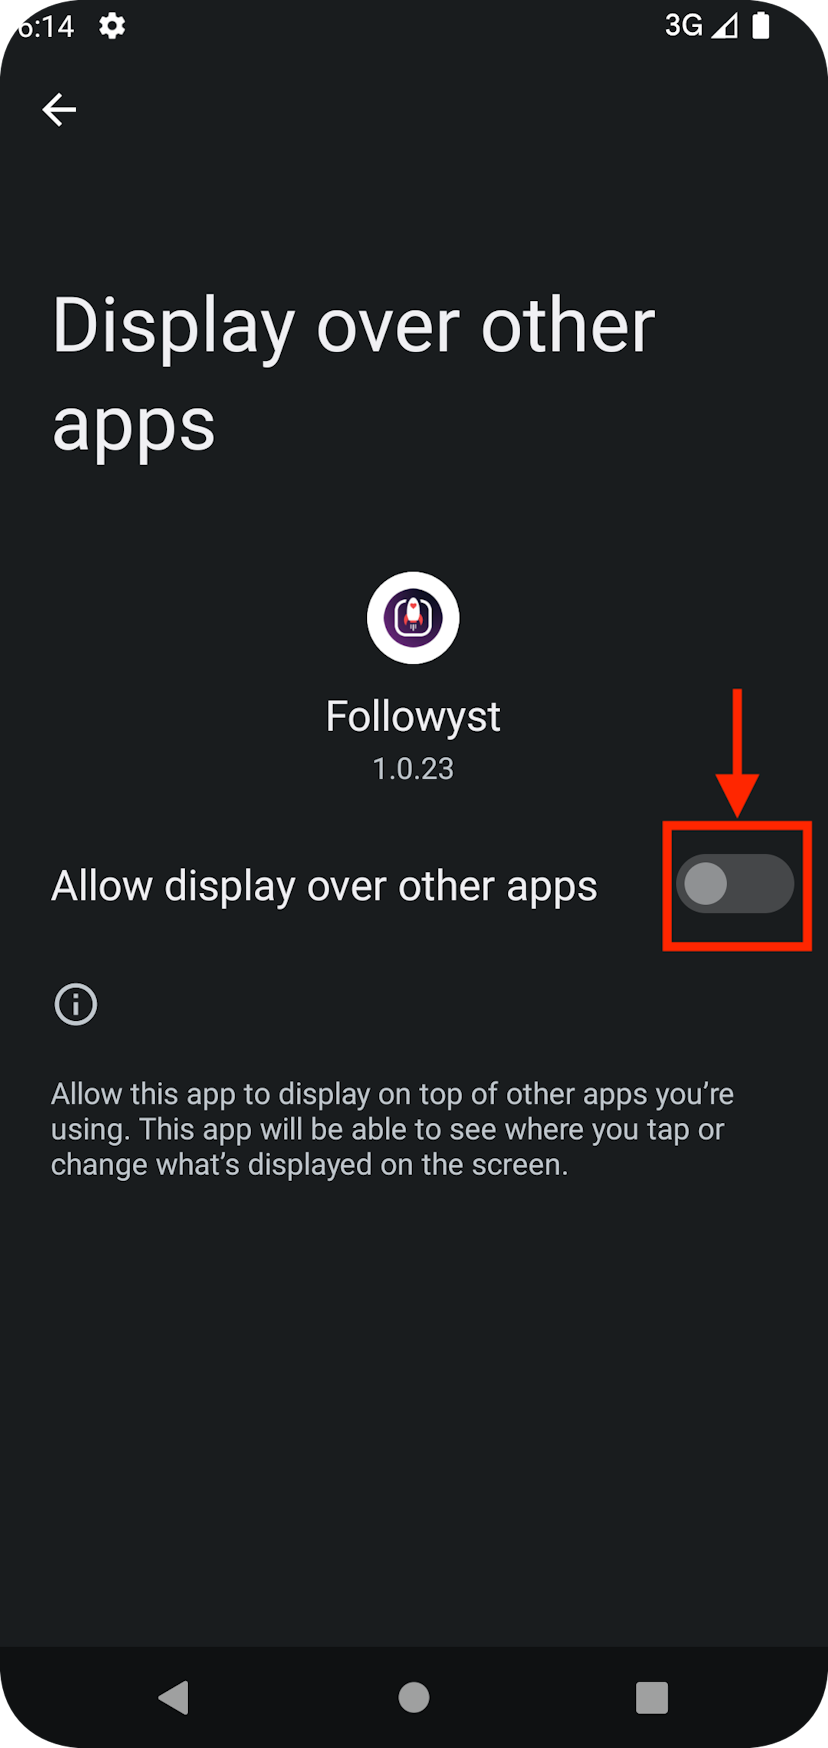
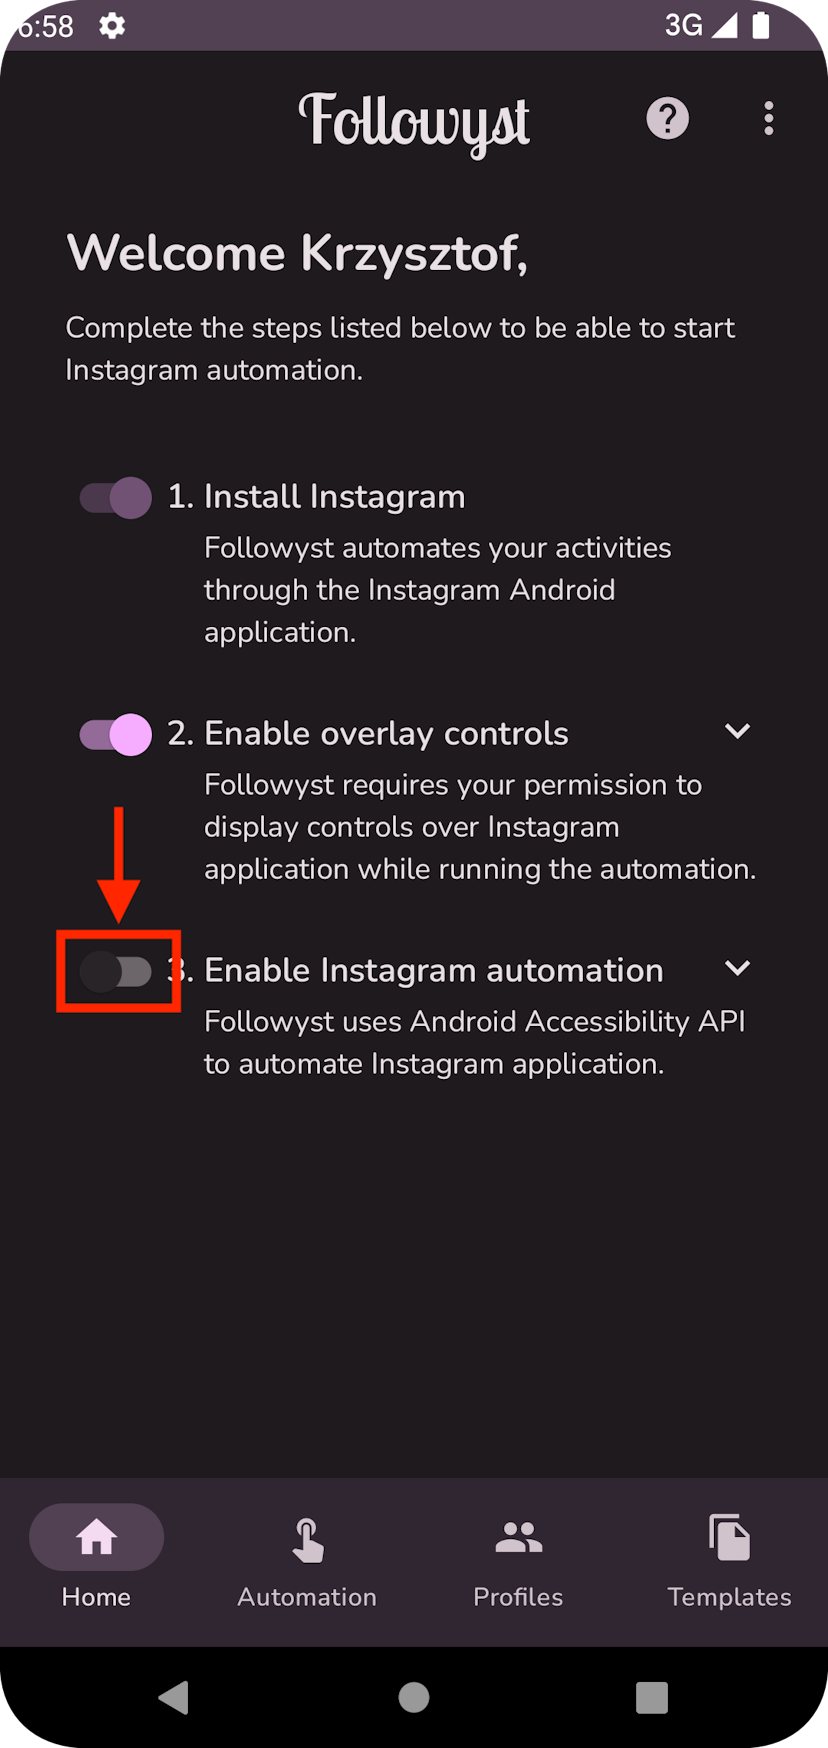
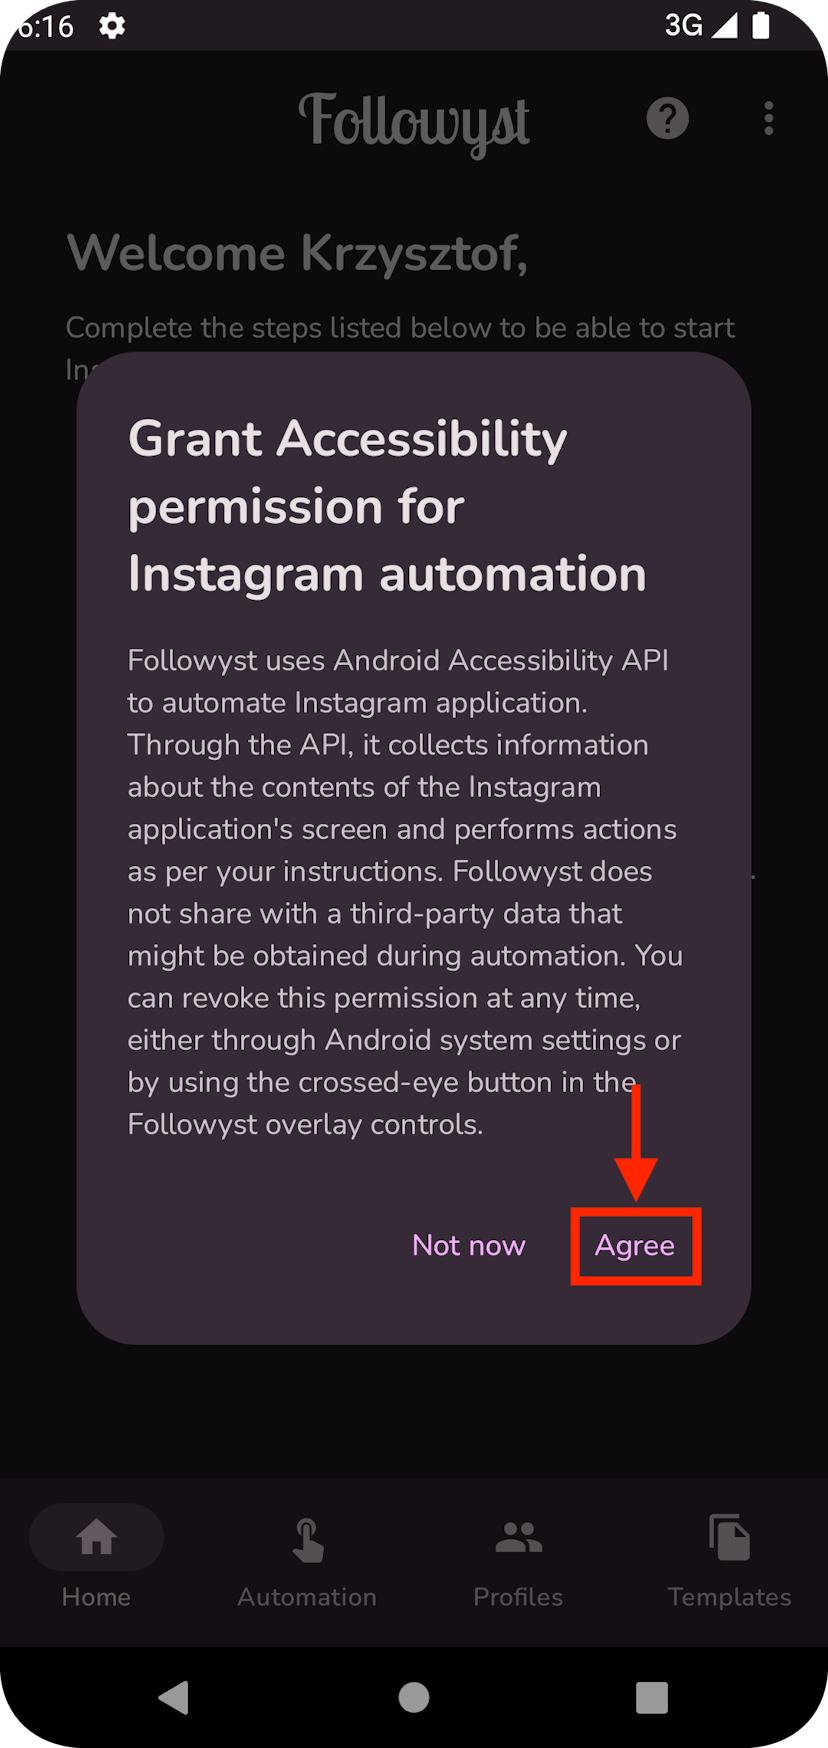
Followyst requires two permissions to run Instagram automation. One is for accessing and interacting with the Instagram app installed on your smartphone. The other is for displaying a nice bubble with automation controls on top of the other apps.
Simply follow the instructions you find on the Home tab inside Followyst on your smartphone. While Followyst doesn’t abuse the permissions and they’re safe to leave them on, you can revoke them at any time you want and re-enable them efore the next automation session.
Your first Instagram automation session
You’re now ready to start your first automation session with Followyst. To do so, you queue up any number of Activities and tap ▶️. Think of Activities as Instagram automation “tasks” to run, with each type of Activity representing an Instagram growth technique.
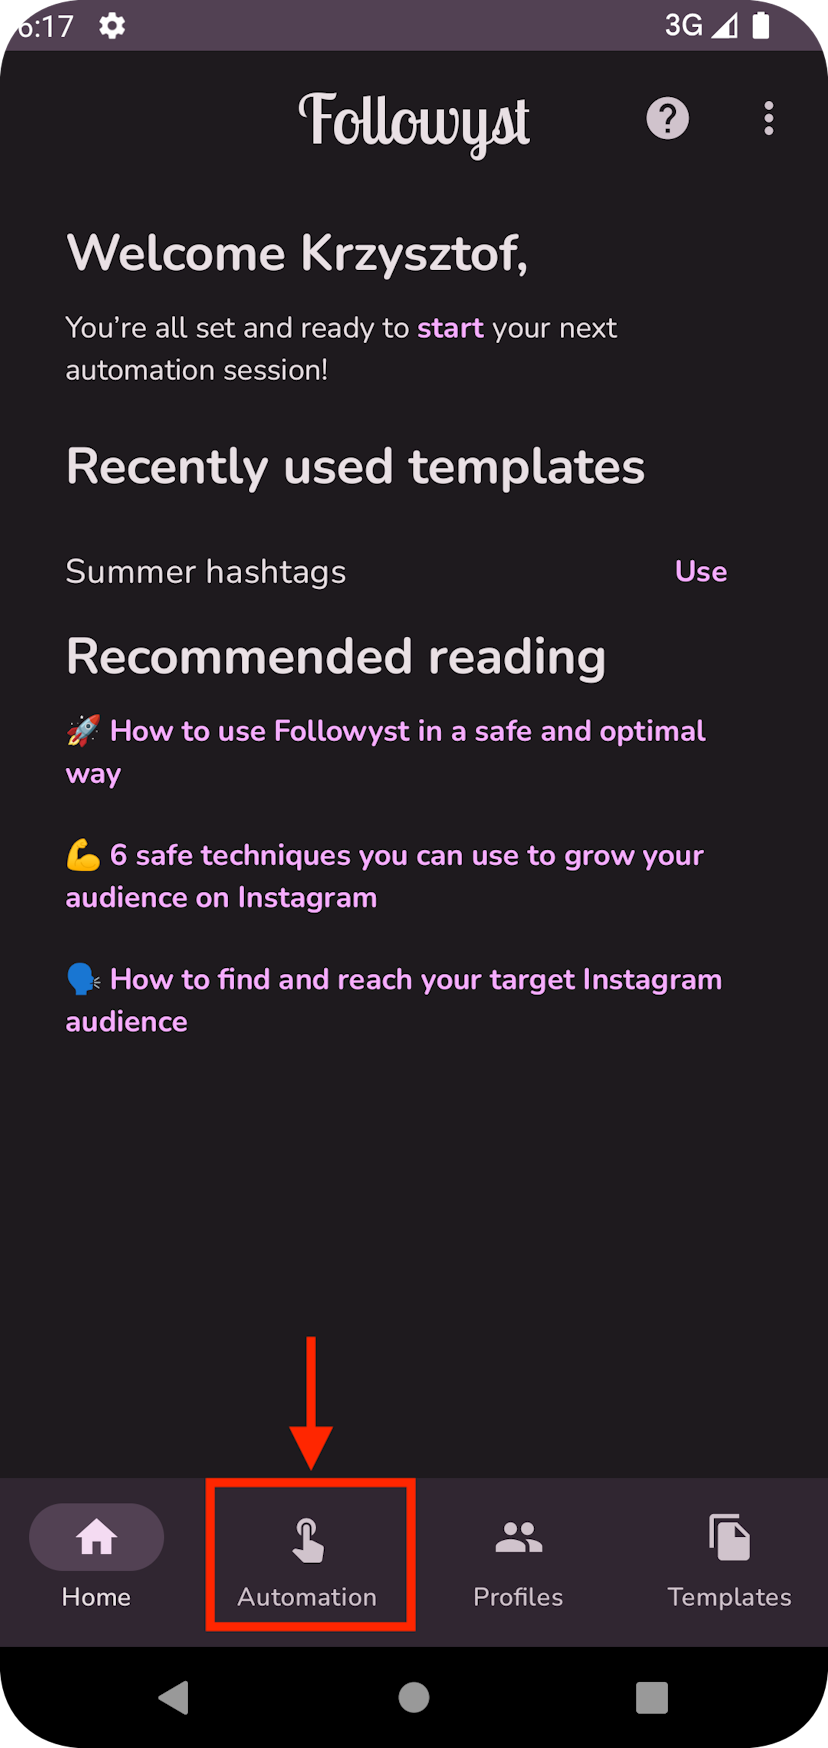
To start the session:
- Make sure you’re logged into Instagram on your smartphone with the Instagram account you want to automate.
- Go to the Automation tab in the Followyst app.
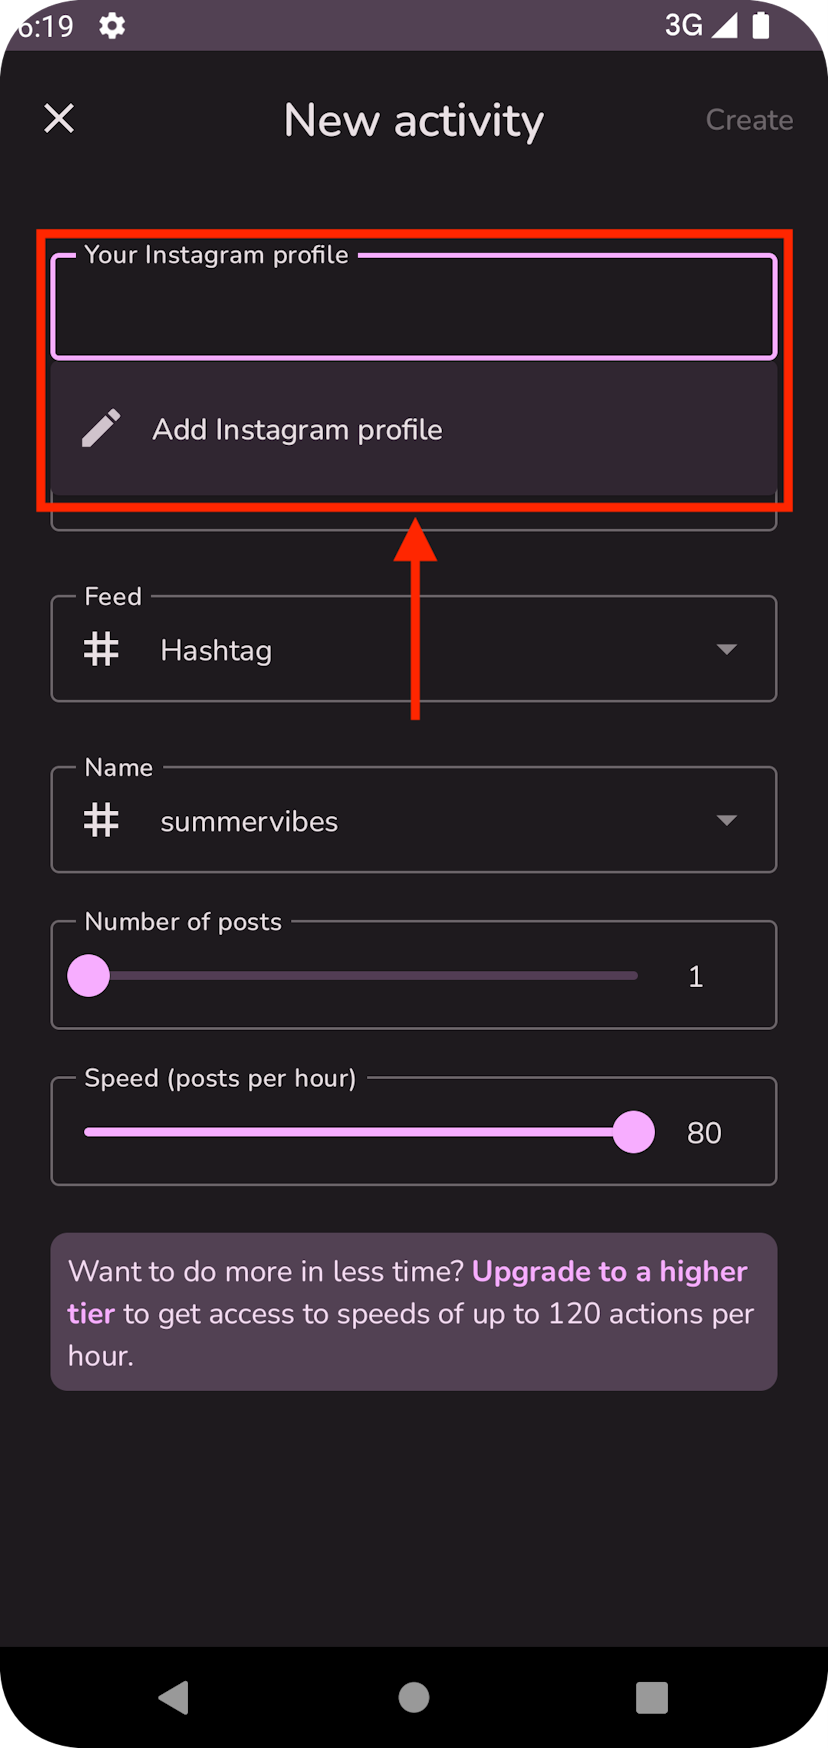
- Tap ➕ in the bottom right corner.
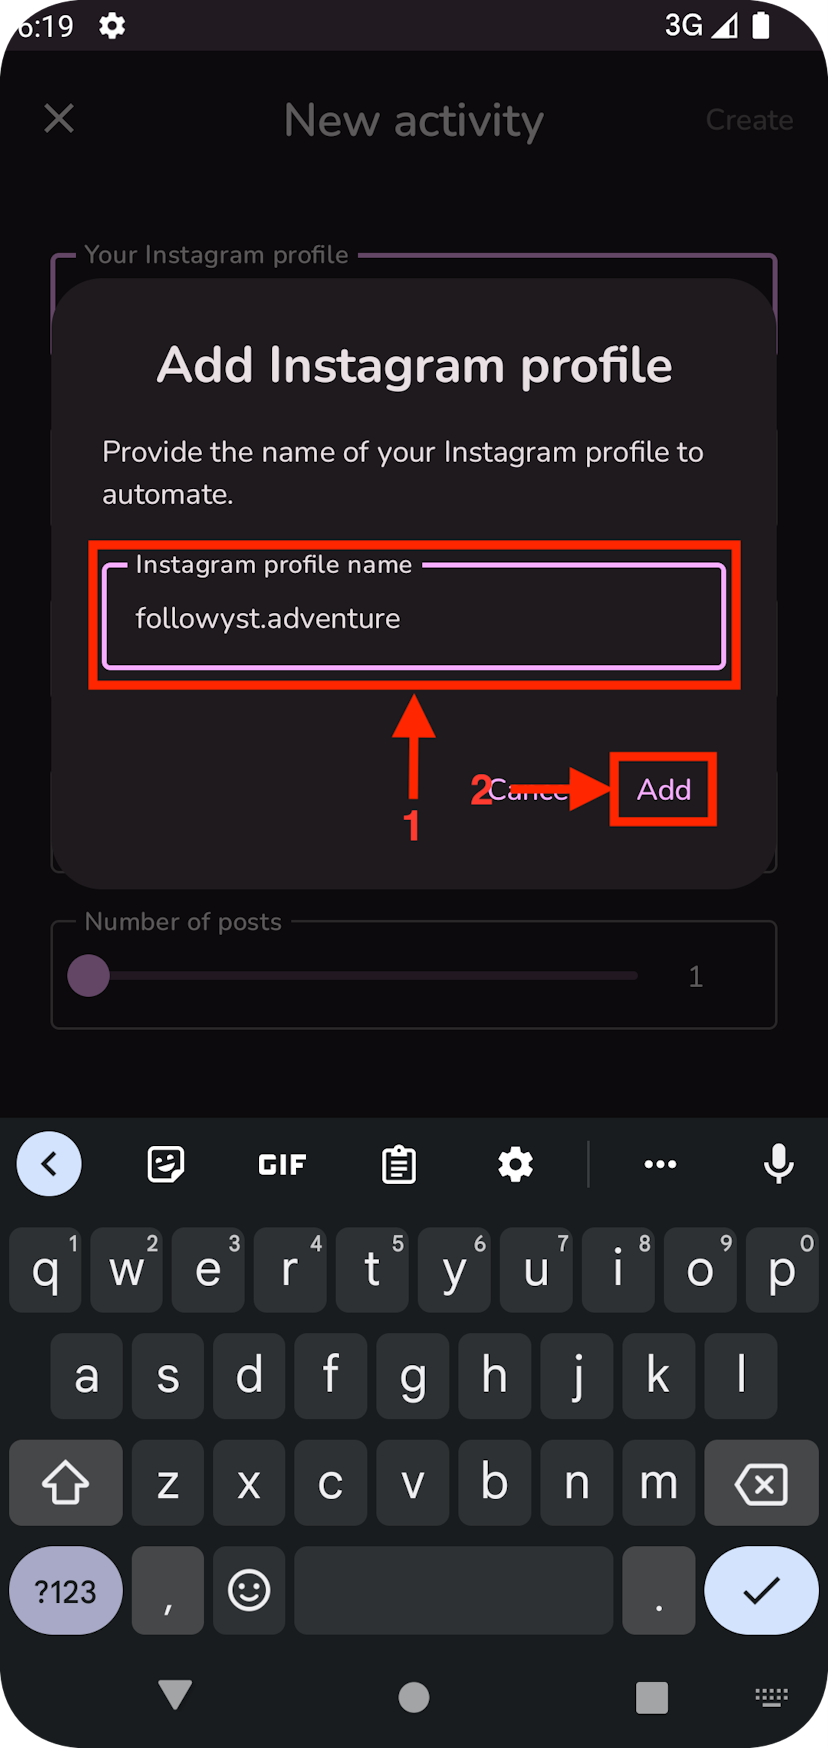
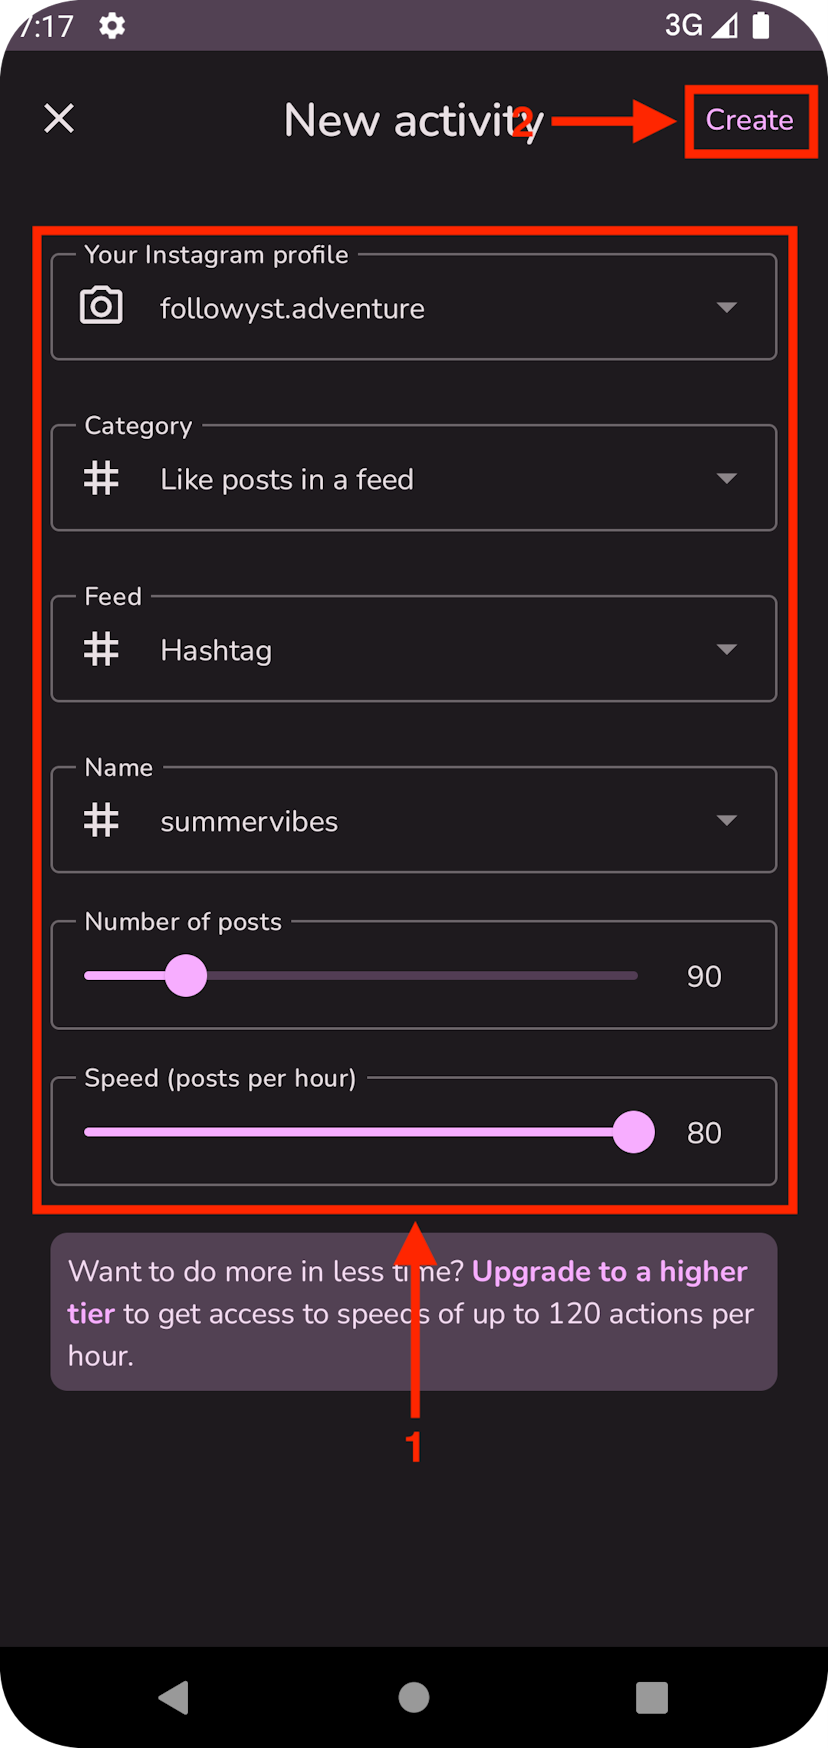
- Tap Your Instagram profile and Add Instagram profile. In the dialog, type the exact username of your Instagram account without “@” and tap Create.
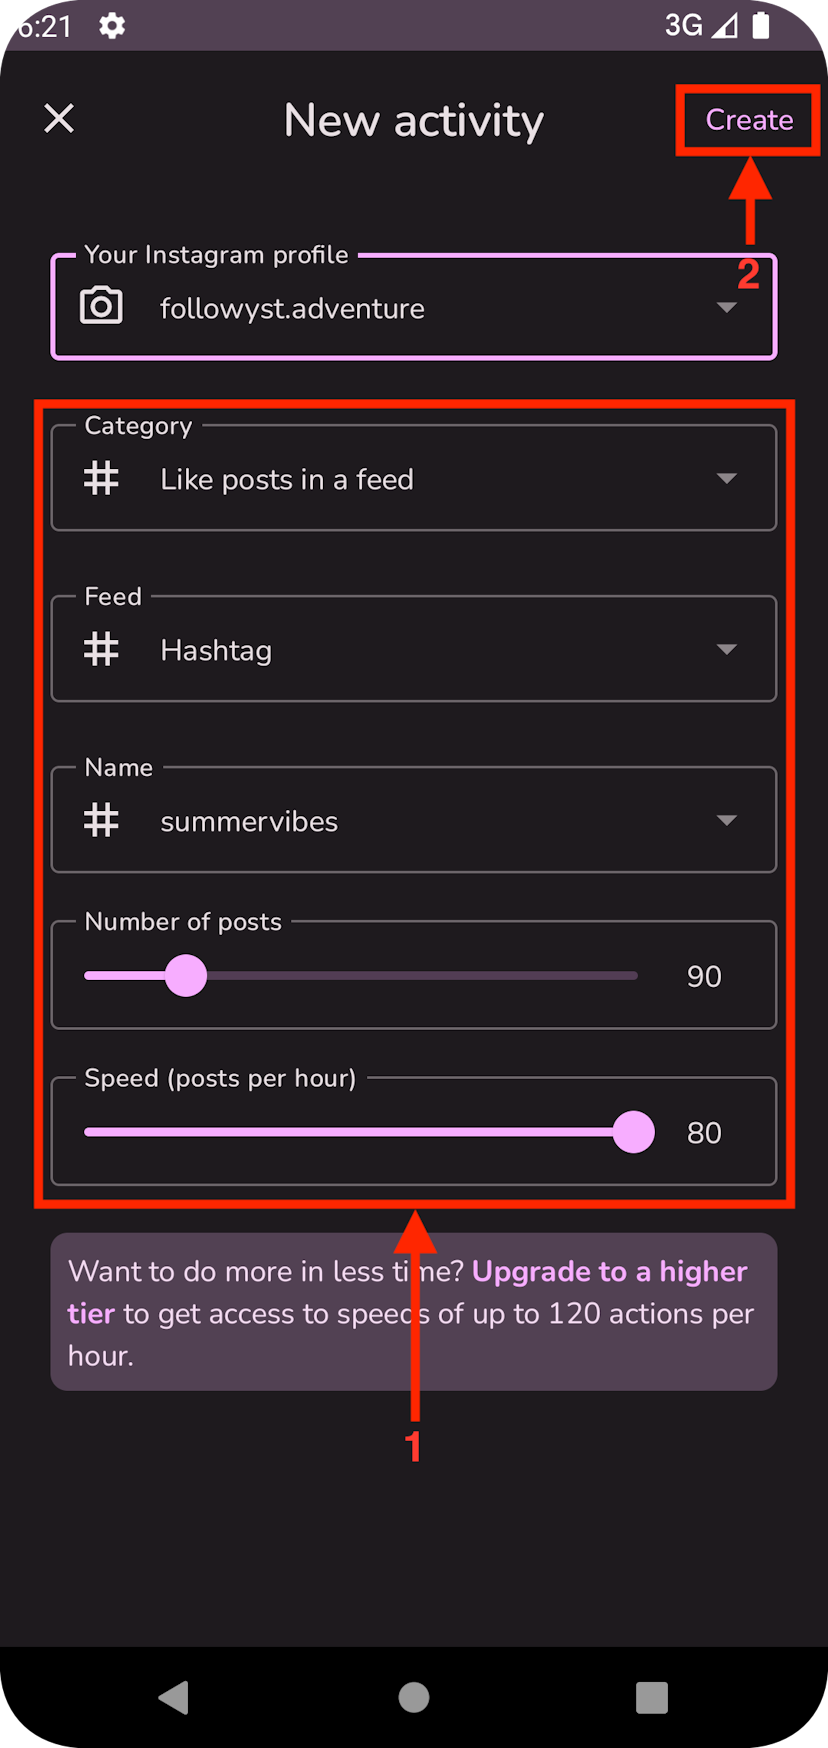
- Select desired Activity Category. For example, Like posts in a feed.
- Select type of feed. For example Hashtag.
- Type the name of the feed. In this example, the hashtag without the leading “#”.
- Select the desired number of posts to like and speed. For example, 10 and 40, respectively.
- Tap Create in the upper right corner.
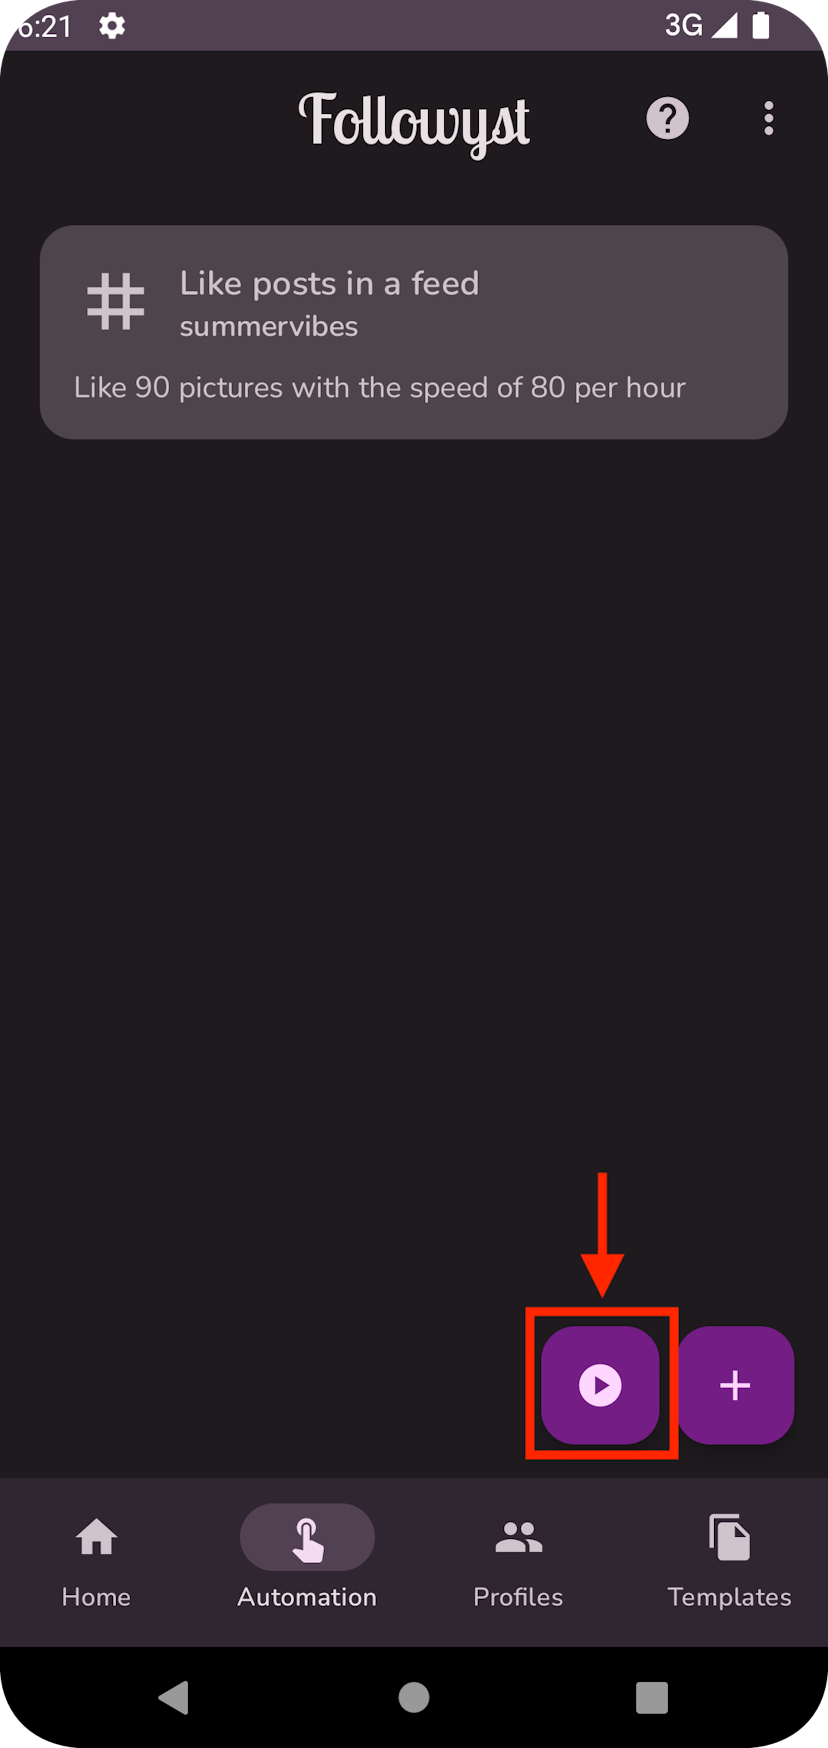
- Tap ▶️ and let the magic happen 🪄.
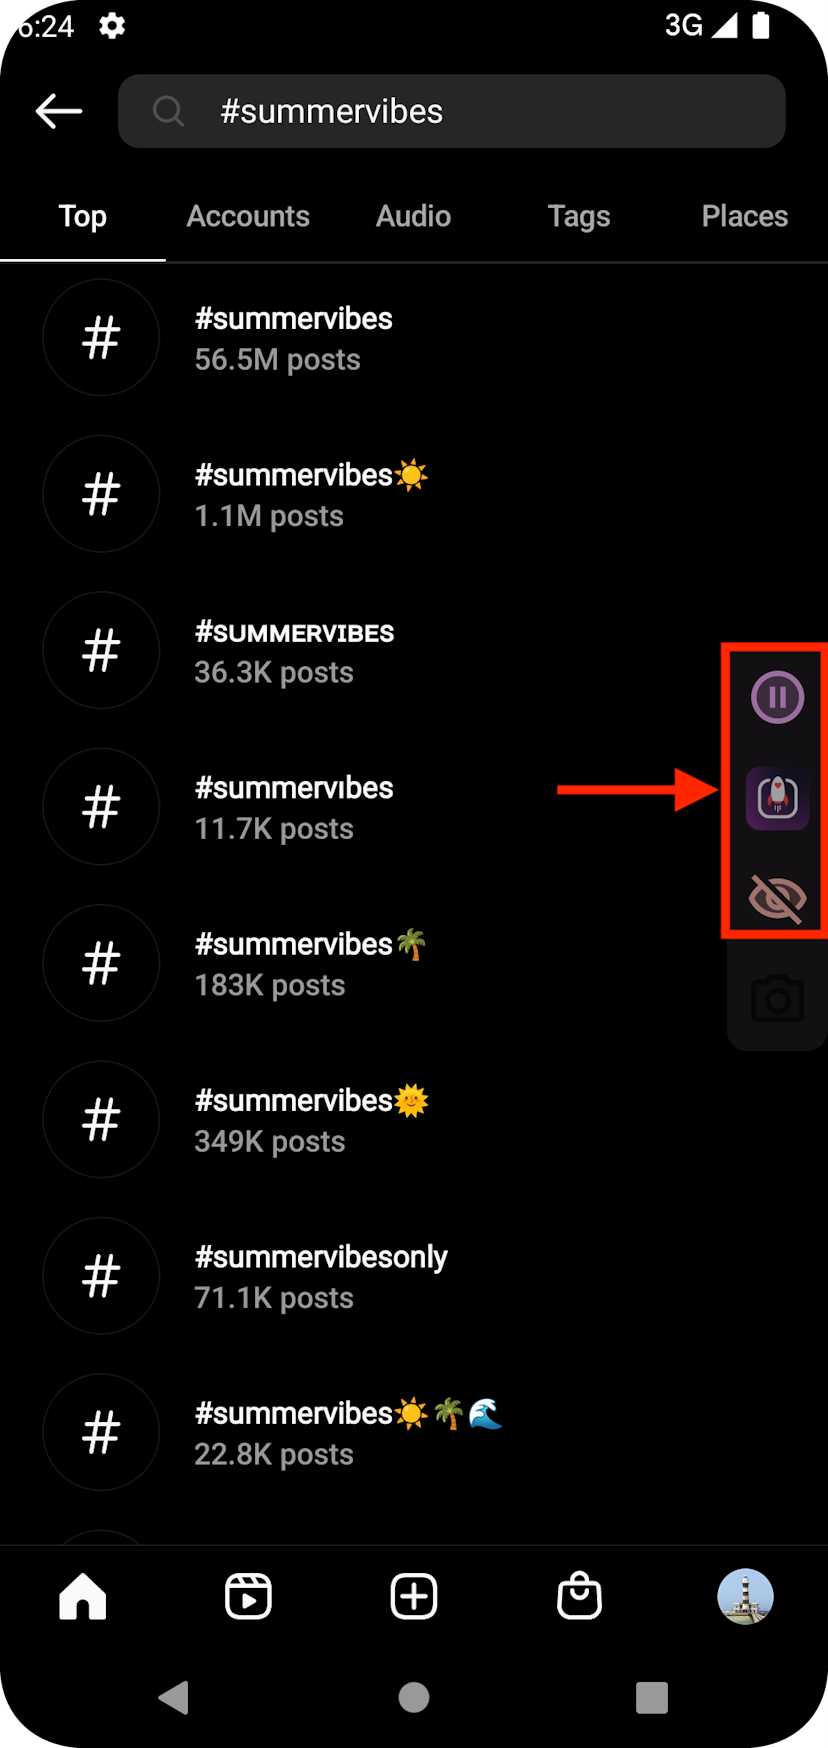
You’ll notice a Followyst overlay widget to the right of the screen. It allows you to pause automation, go back to the Followyst app, among other options.

You can queue up as many Activities as you want. Followyst will go through them in the order you specify. It’s possible to reorder Activities by dragging them, while removing, canceling or simply clearing is as simple as swiping right on the Activity card. You can also edit queued up Activities by tapping on them.
We’ve summed up the Instagram growth techniques available in Followyst on our blog. It’s worth checking out, especially if you need some guidance on which Activities will be most useful for you.
Getting off the ground might be a bit overwhelming, so we’ve prepared an article on how to use Followyst in a safe and optimal way. It’s a short, recommended read that we think will be useful to you.
Using templates to quickly start new automation sessions
There’s more Followyst has to offer after you get familiar with the app and discover which Activities work best for you. In particular, you can cut the time required to start your Instagram automation sessions by using Followyst templates. They let you specify a list of Activities with settings of your choosing, that you can later all queue up with a single tap.
To create a template:
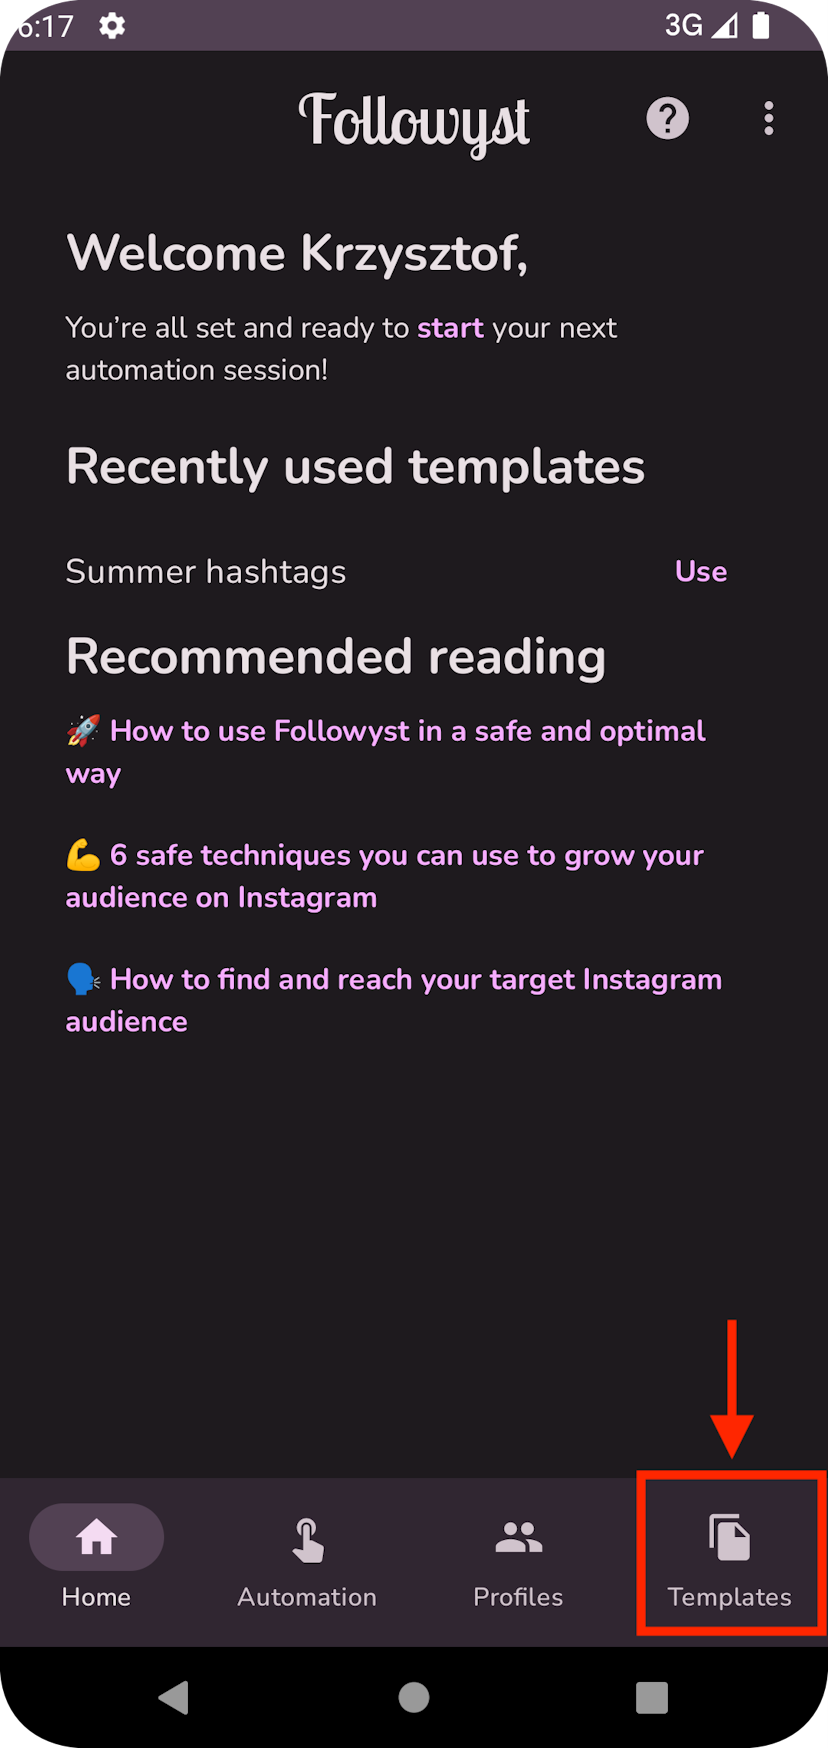
- Go to the Templates screen in Followyst via the bottom bar.
- Tap ➕ in the bottom right corner.
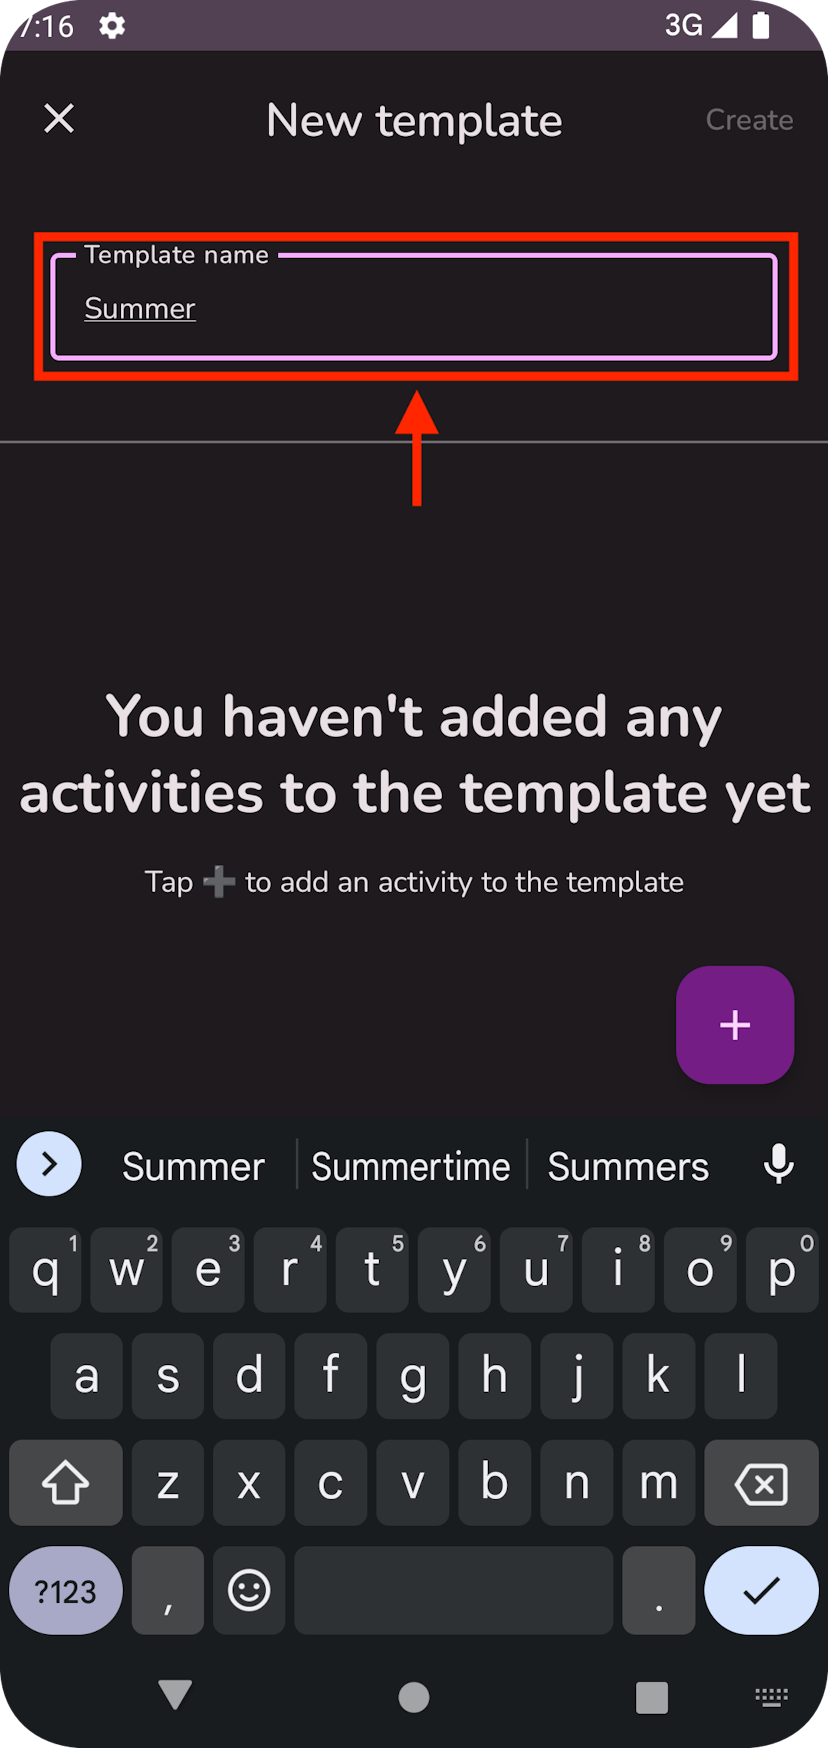
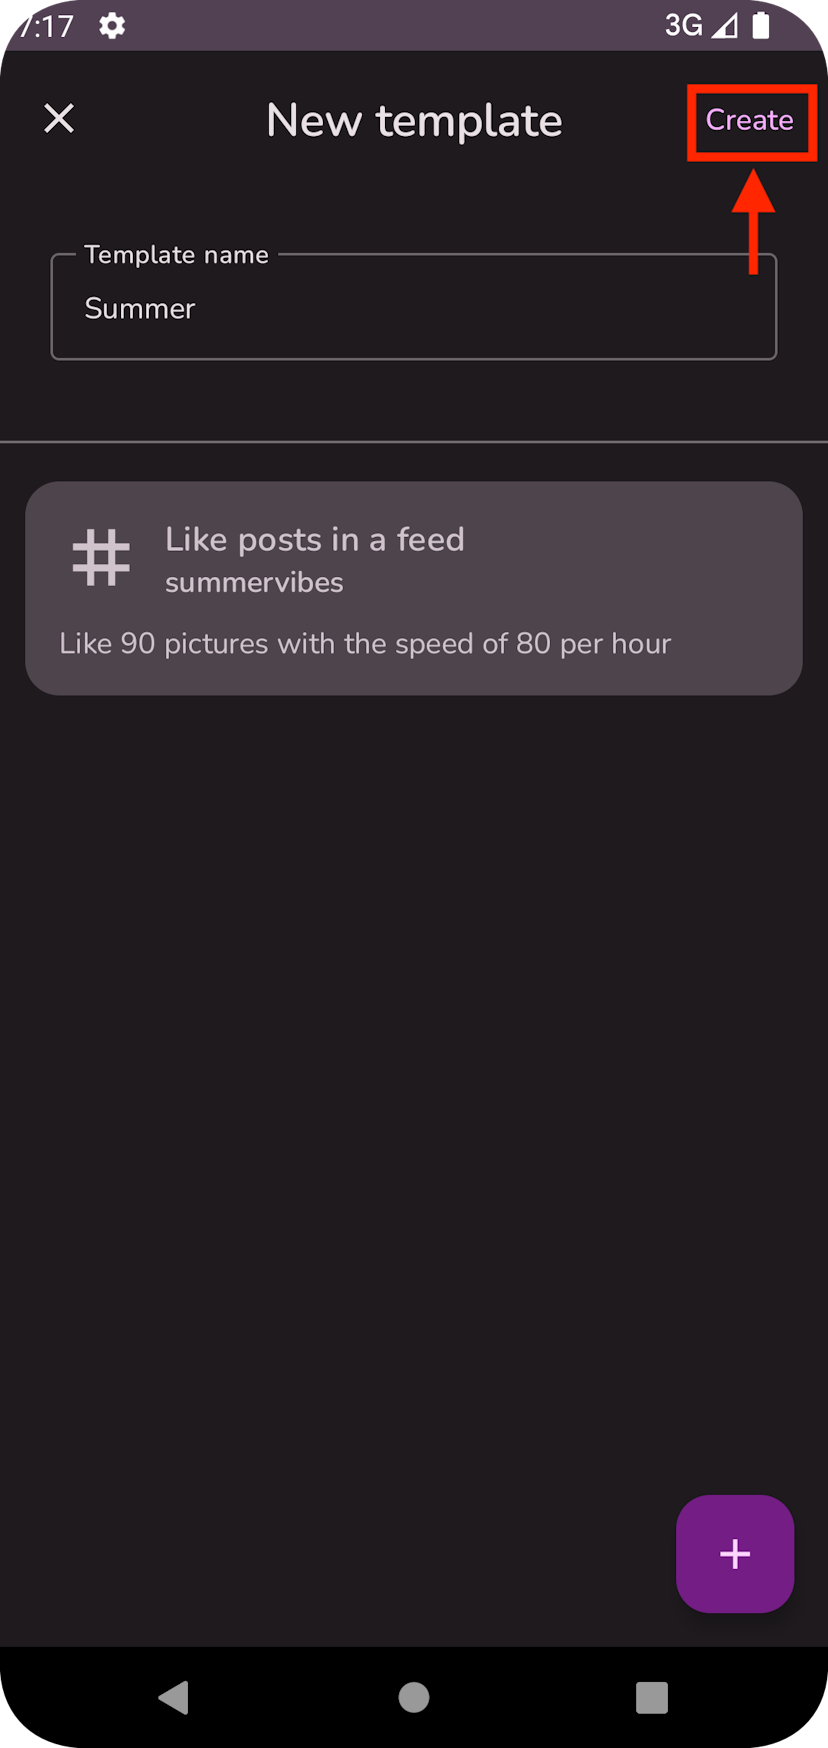
- Enter the name of your template. Something descriptive enough to make it easy for you to discern between templates.
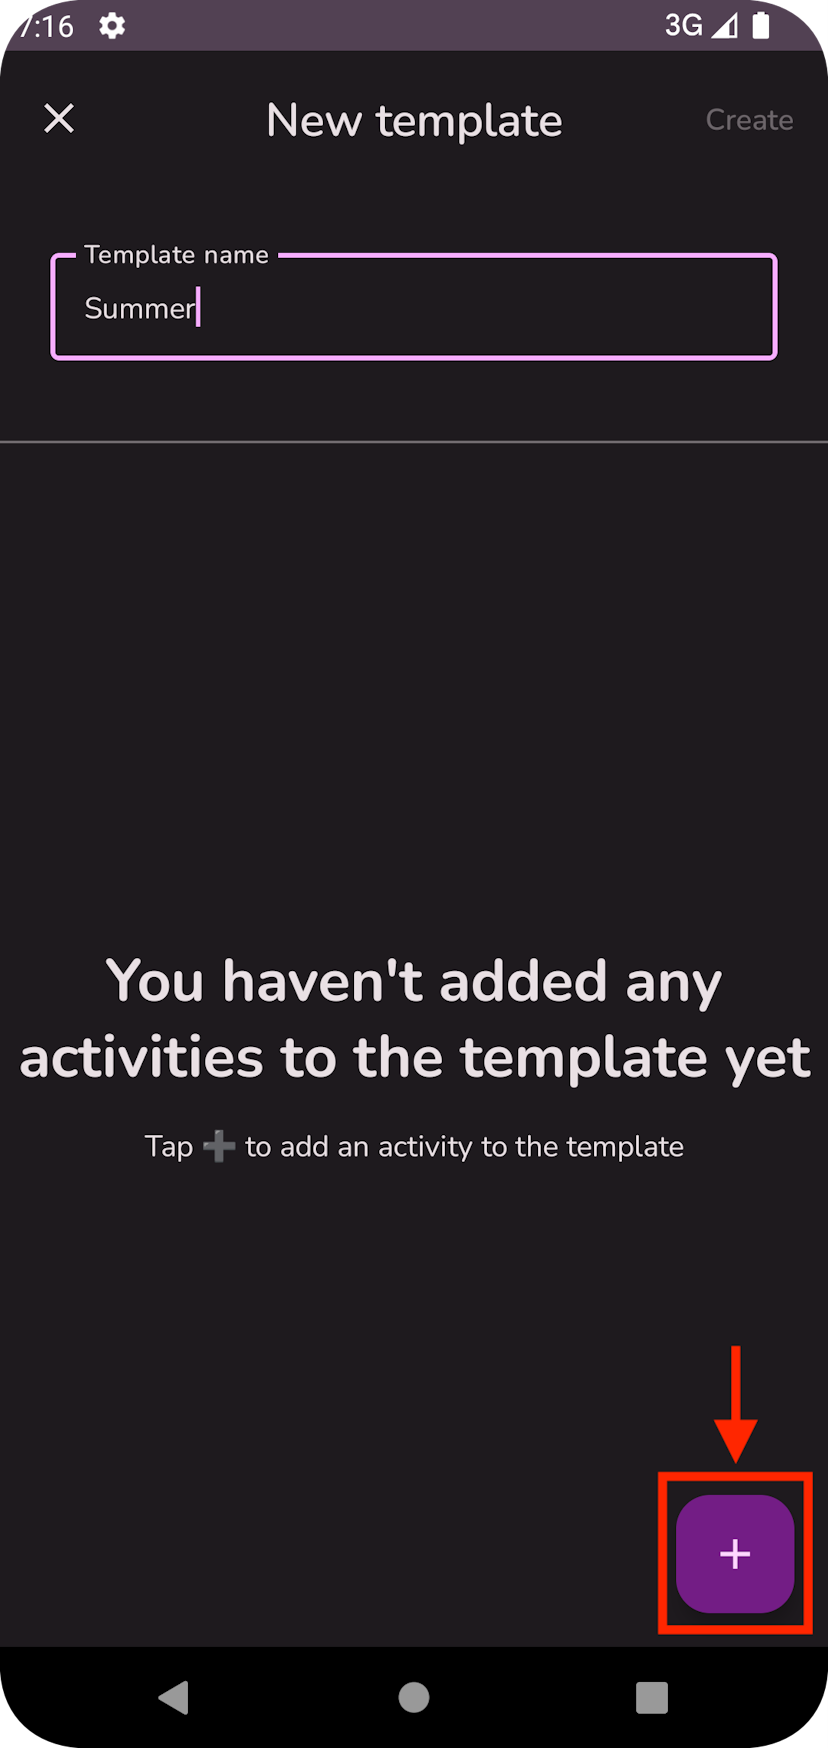
- Tap ➕ in the bottom right corner to add an Activity to the template. You can add as many Activities as you want.
- Once the template is up to your liking, tap Create in the top right corner.
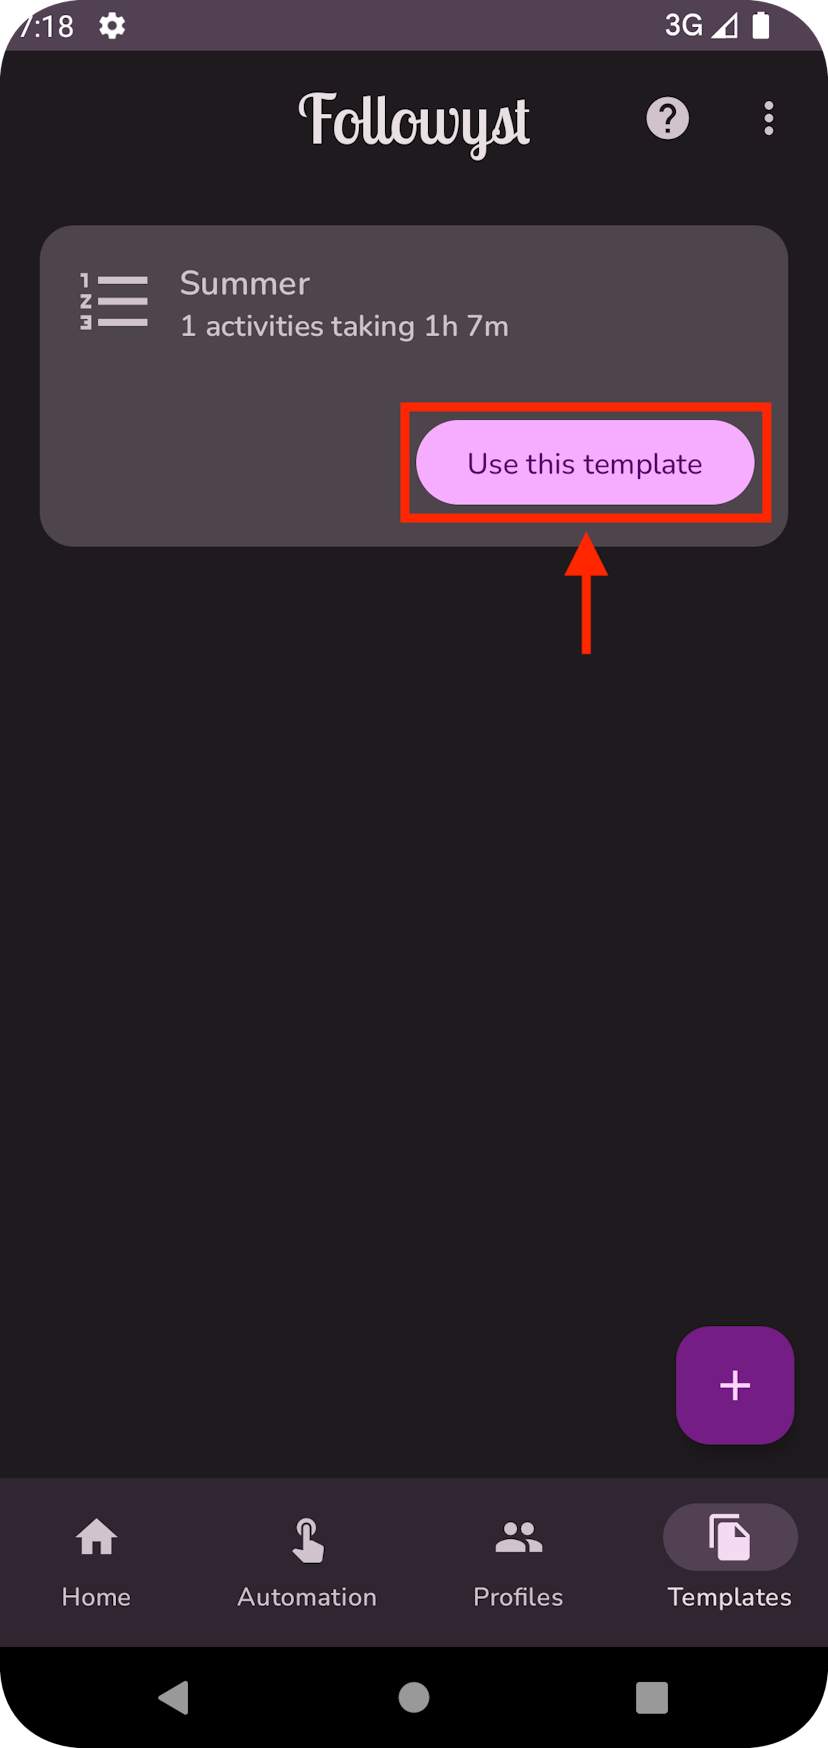
- In the Templates screen, tap Use this template of a template to queue up all its Activities.
- In some cases, you might want to tweak some settings once you queue up Activities from a template. You can do so the usual way by tapping on the select Activity in the Automation screen.
- Tap ▶️ to start automation when you’re ready.


The same gestures apply to Activities in the Templates screen as in the Automation screen (tap to edit, tap & hold to reorder, swipe right to remove).
You're all set!
Let us know how you feel about the product by e-mailing us at support@followyst.com. We can’t wait to hear from you!
Happy Instagramming!